On Finishing a Tapestry
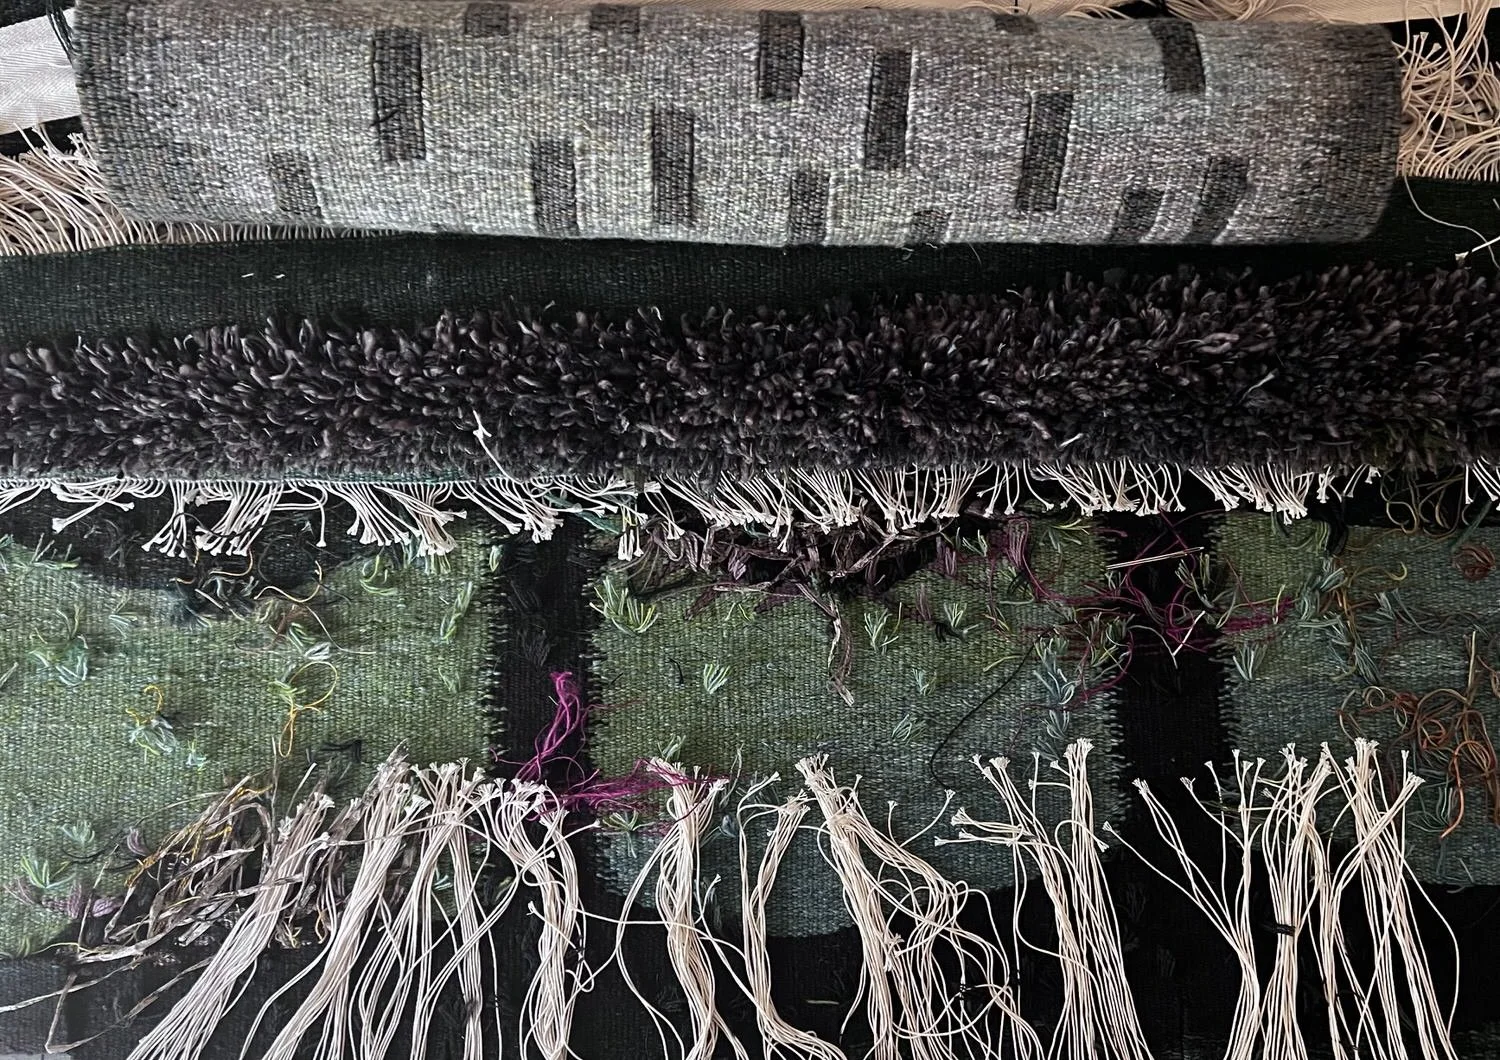
Three tapestries in the process of “finishing”
I’ve been working on “finishing” my last three tapestries this past month. Slowly. Some days for only an hour or so. Most days not at all.
I don’t normally wait months to do this bit. Usually, anything with a dimension of over 16 inches I would finish and get ready to hang right away. My method with tapestries this size is different than the smaller ones. It starts out the same, but has some additional steps.
The first steps, are, of course, to clean up the back, which I do by cutting the wool ends. I would tie any cellulose fibers and needle them in if the piece is headed straight away for an exhibition or purchase. (But - confession - I let them hang if the destination is one of my own walls).
I also steam the whole piece lightly and square up any uneven areas.
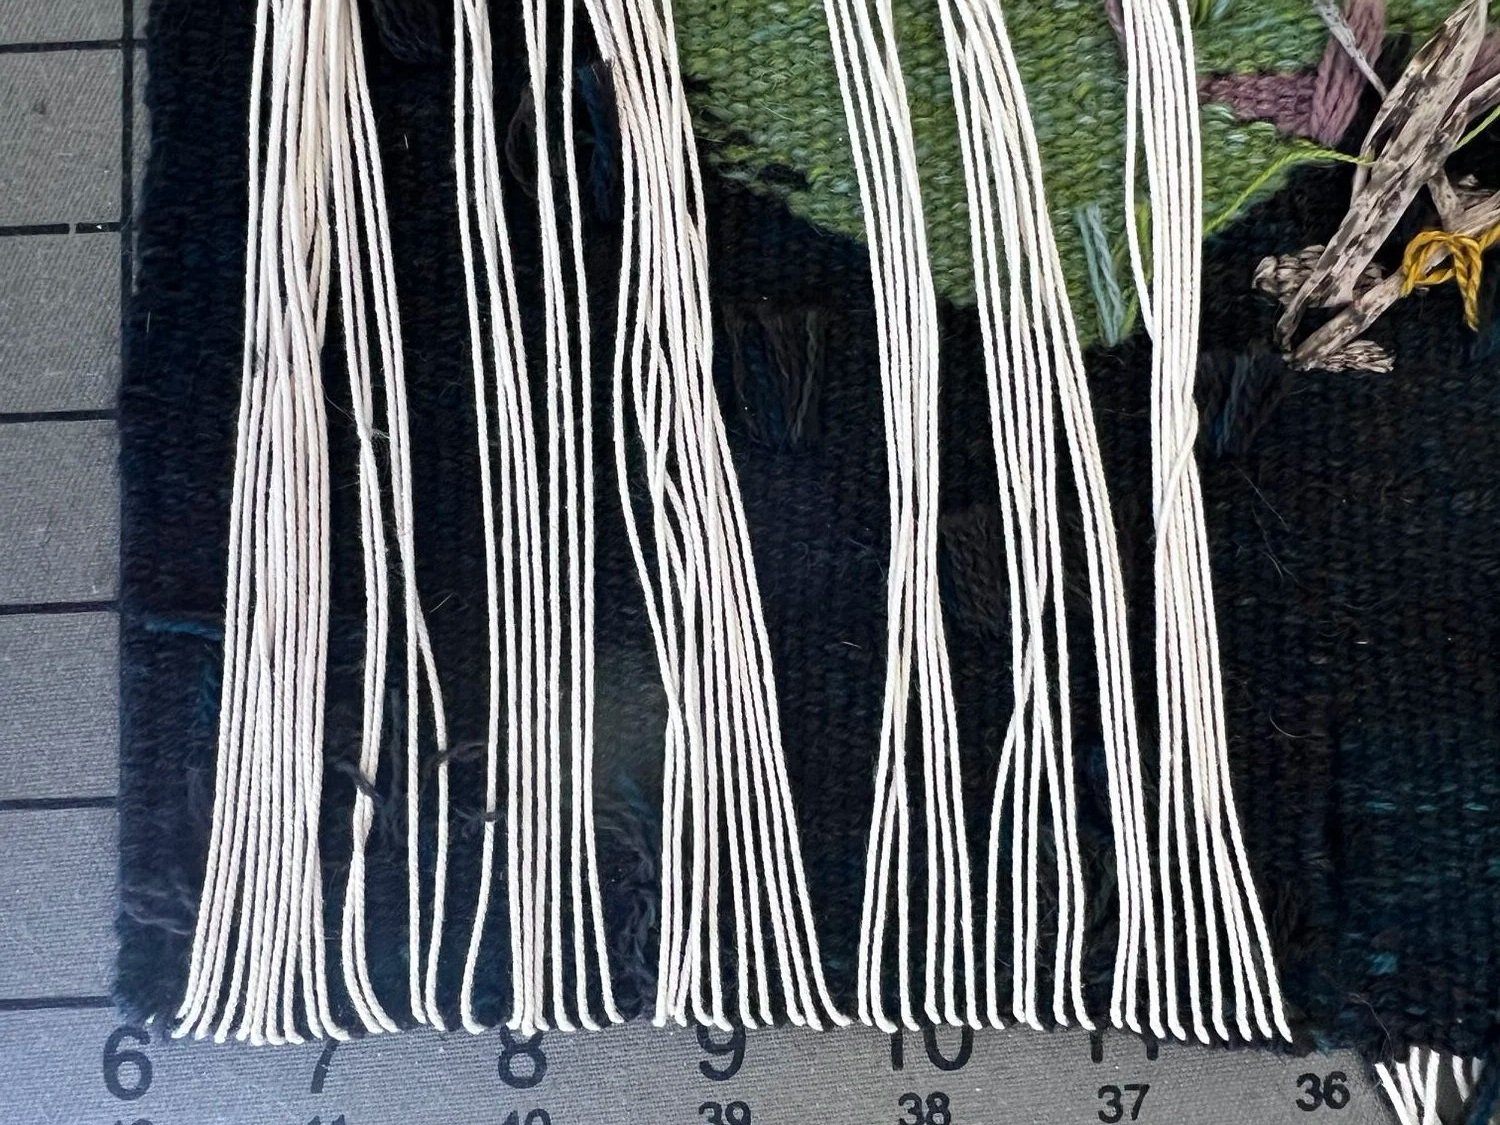
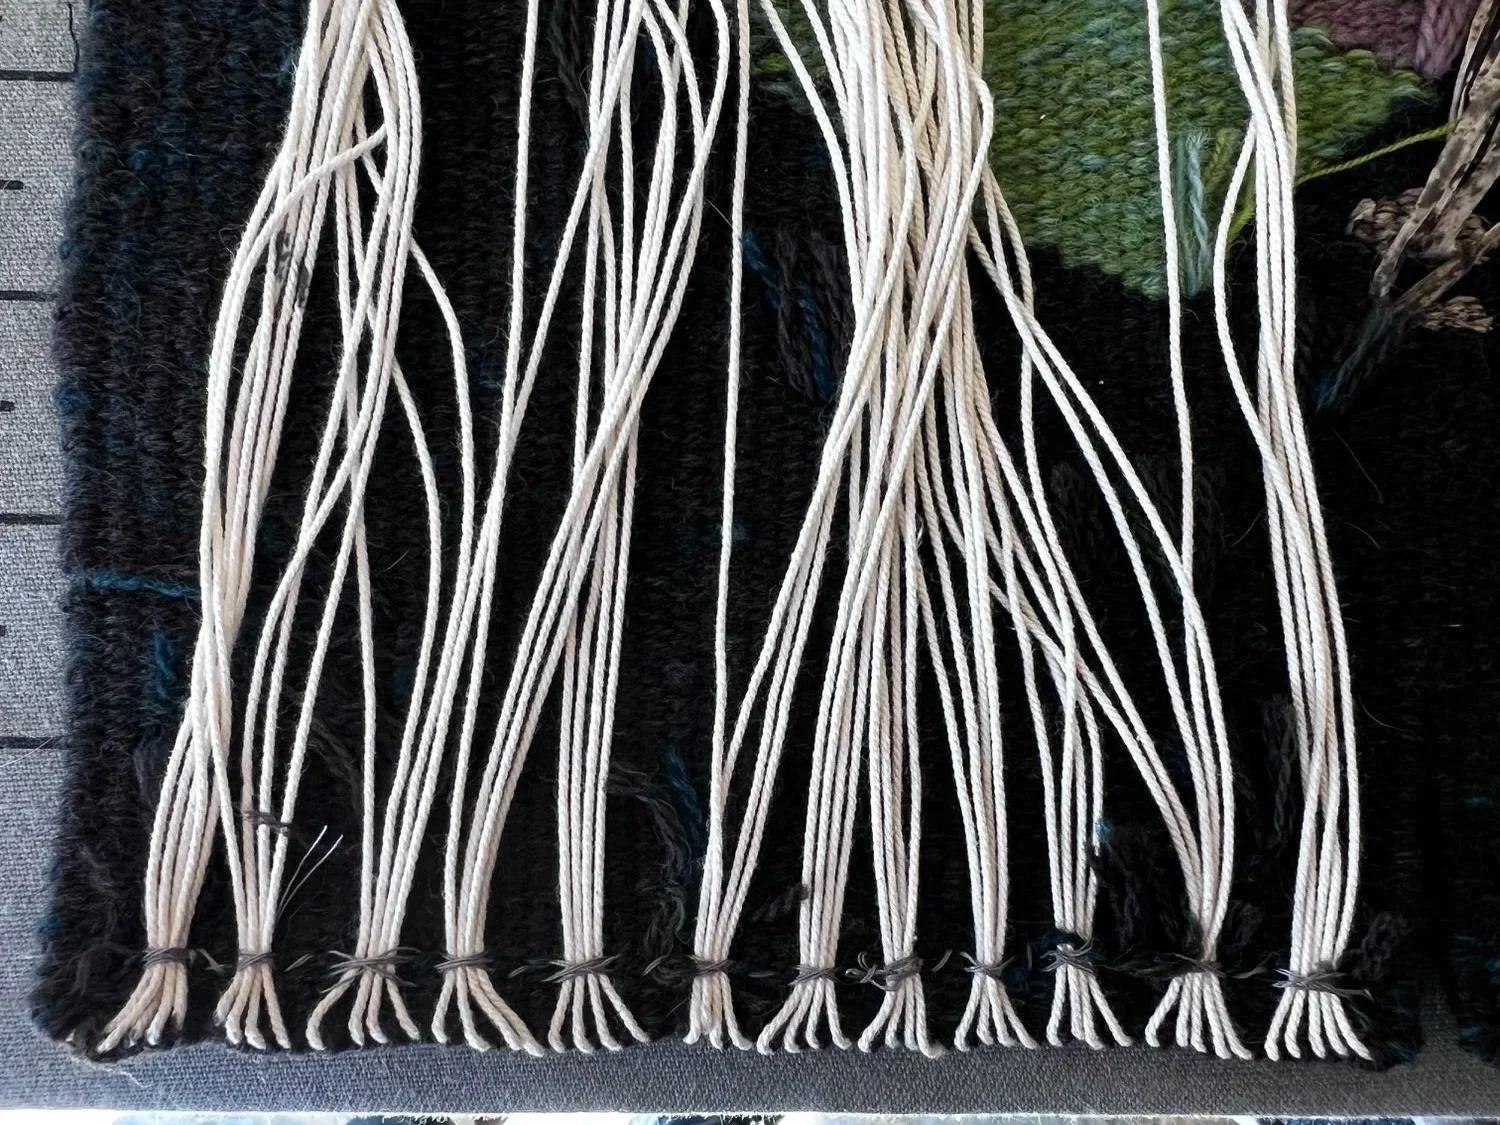
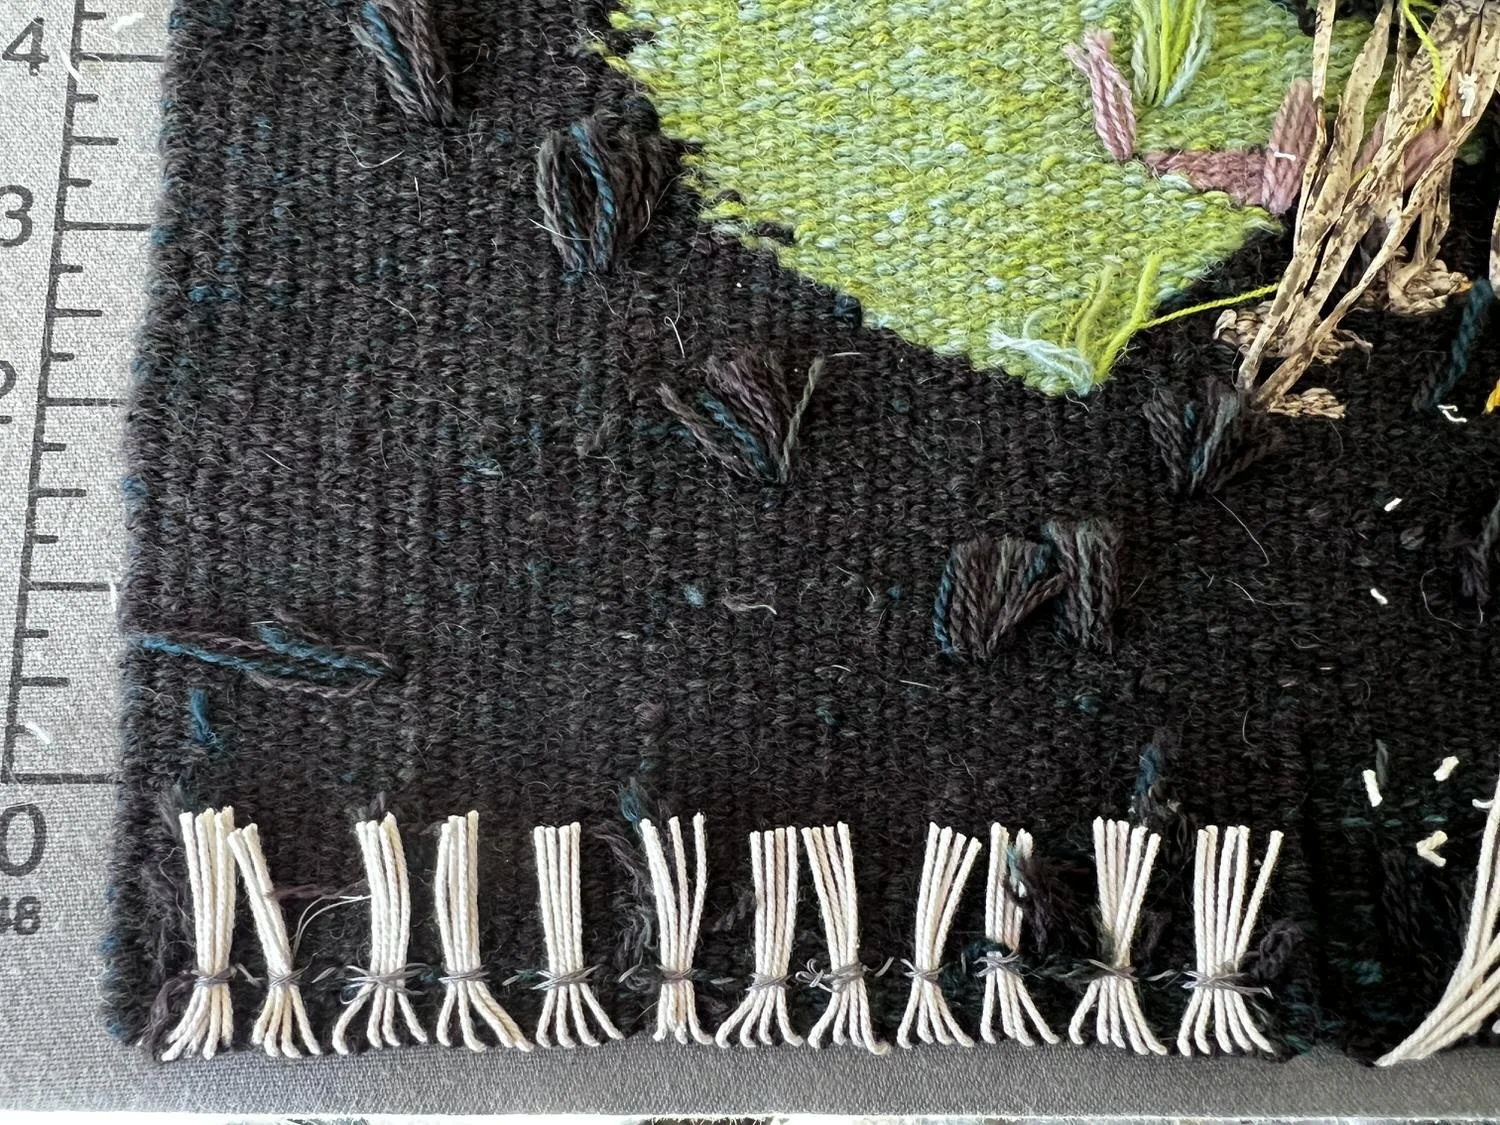
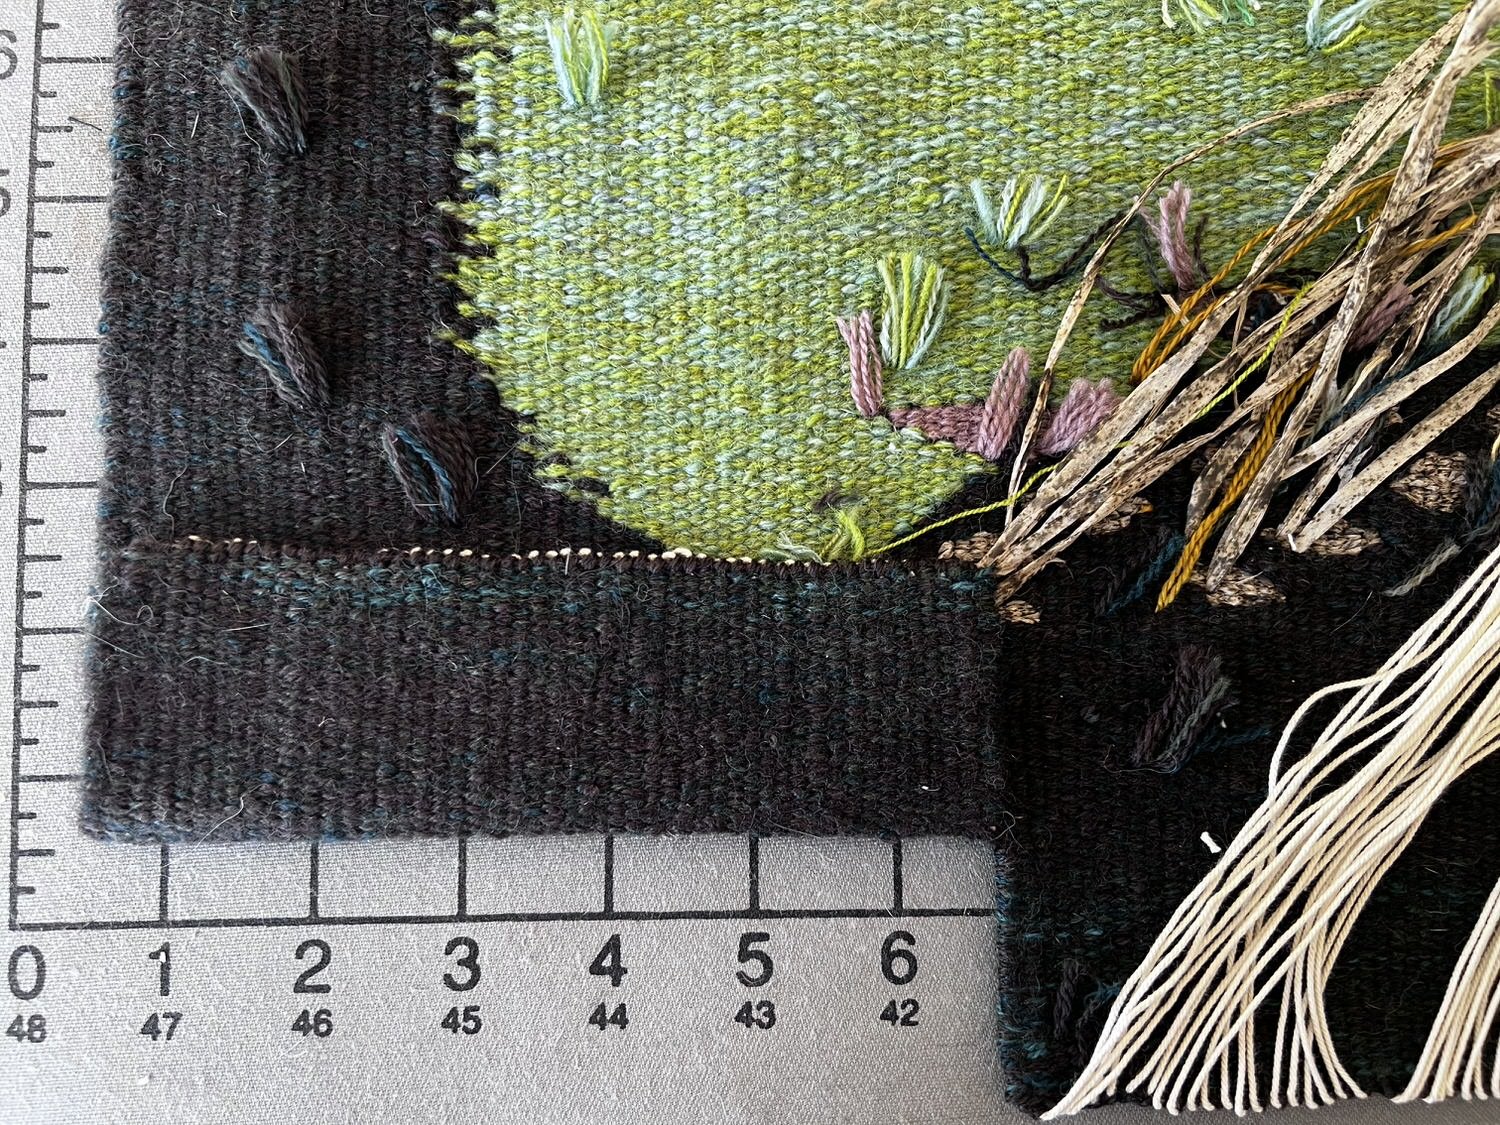
The turnbacks and warp ends are treated the same way I would a smaller piece, as in the above photos, showing one section of the bottom hem on Once Upon a Time. This tapestry is 72” in width so I wove the turnback in 7 sections. I usually do this with larger tapestries. The last photo above shows the first section folded up, ready to be stitched down to the back of the tapestry.
I mentioned that additional steps are required with these larger tapestries; one of which involves the use of a sewing machine- thus, I believe, the procrastination.
Once the ends and hem are stitched down, I gather the twill tape and velcro. First, I wash the twill tape, dry it, and iron it.

velcro pinned to twill tape, ready to sew
The velcro is next. That’s where the sewing machine comes in. If you’ve ever attempted to hand sew velcro onto anything you can understand the use of a sewing machine. Fortunately I have a great one; I just don’t use it often enough to enjoy it.
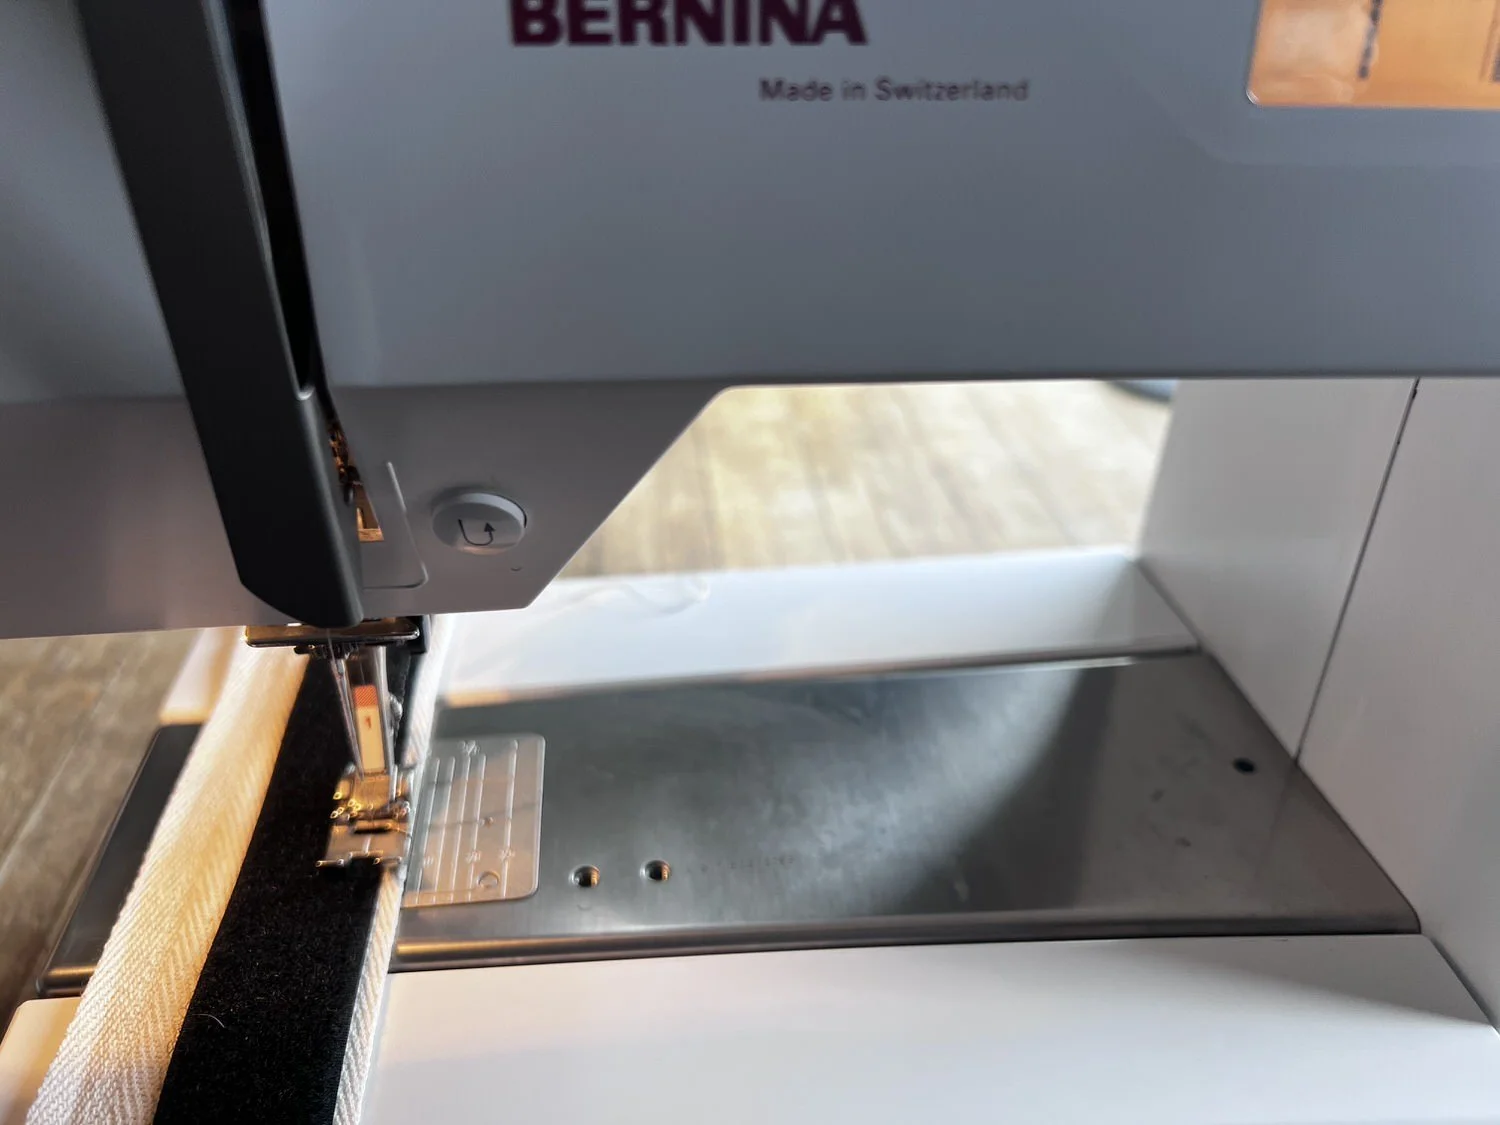
sewing the velcro to the top edge of the twill tape
With the velcro sewn onto the twill tape, the tape is then hand sewn onto the heading of the tapestry along the top edge.
It is then further secured using a zigzag (my terminology- I think) method I learned when doing the Waterline project. Since I’m still not at this point with these three tapestries, here’s the Waterline tapestry as a reference.
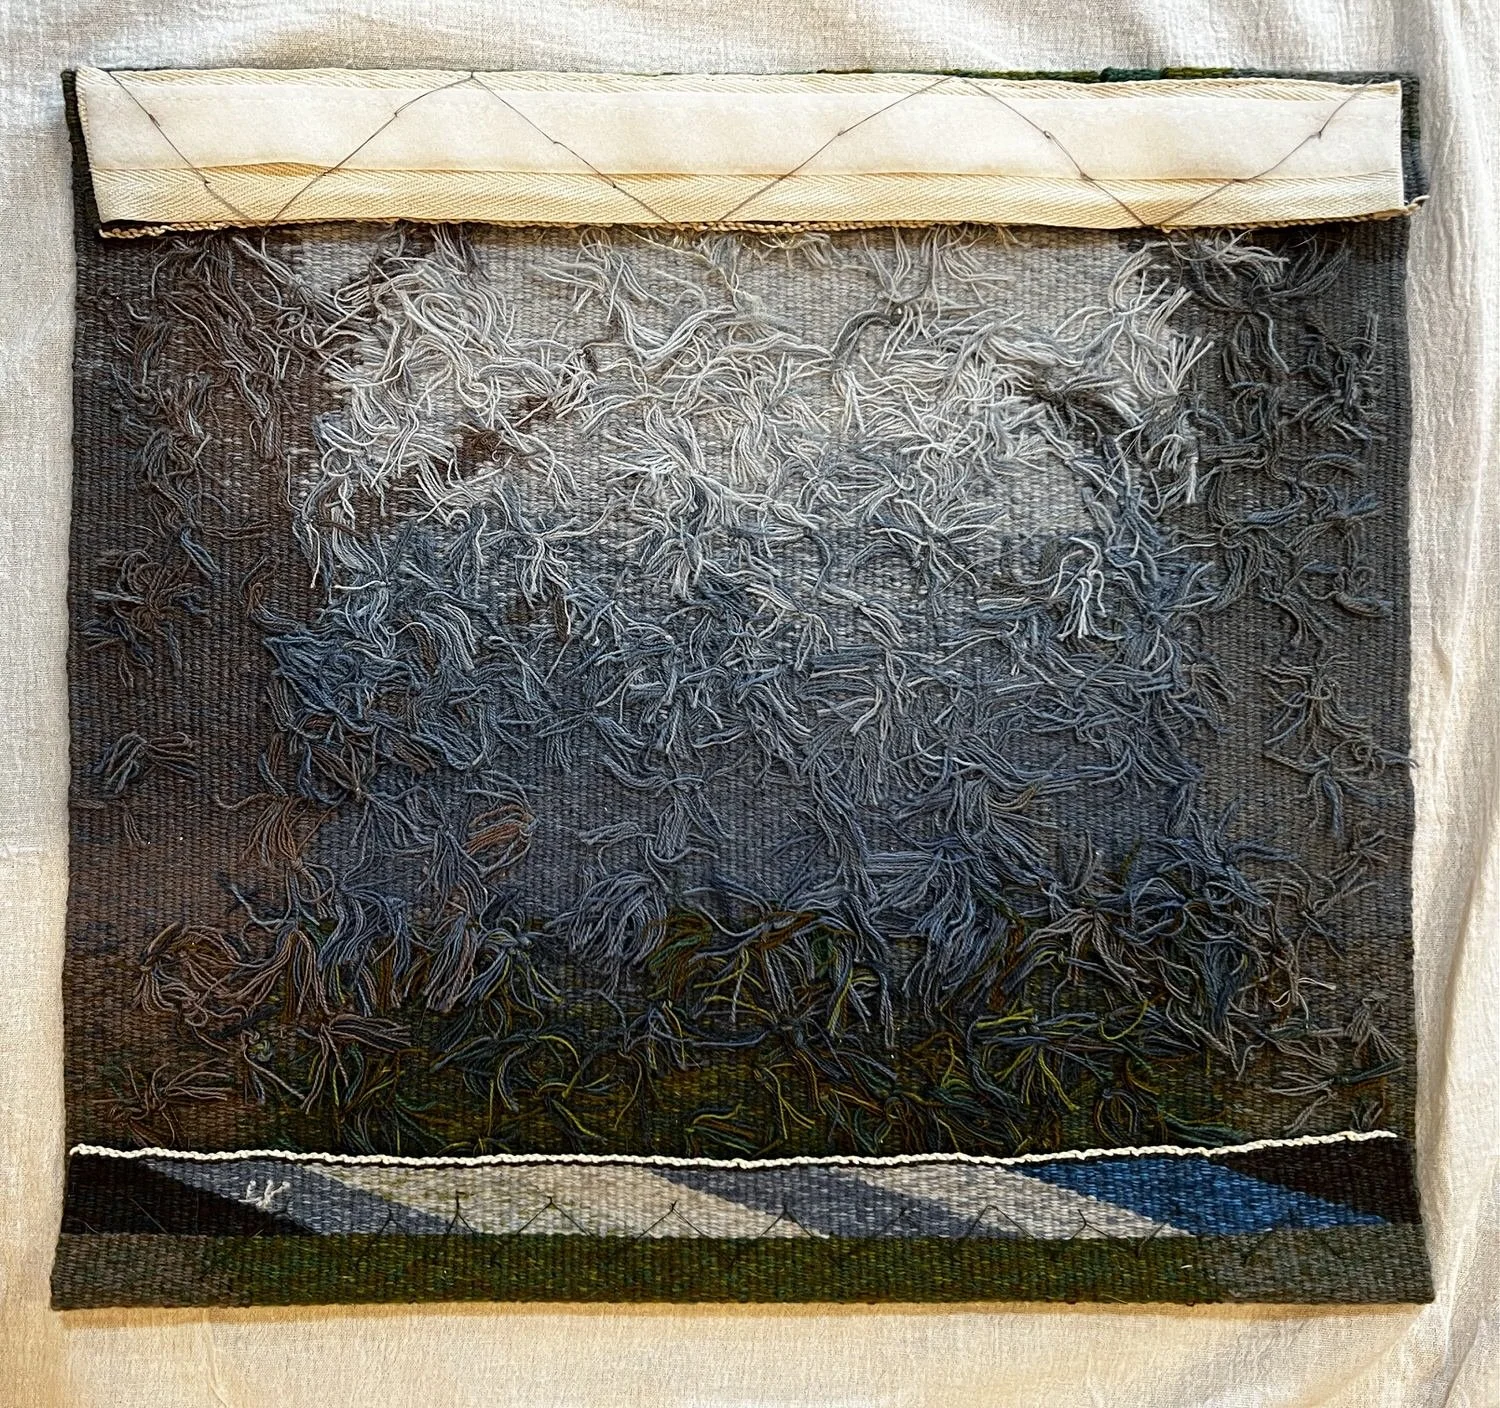
Waterline tapestry from the back showing the zigzag stitching to prepare for hanging. Notice the velcro is only sewn along the top edge.
At this point, all that’s needed is to attach velcro to a wooden slat that can secure the weaving to then be hung on the wall.
In case you’re interested, I wrote briefly in the past about finishing smaller tapestries here and mounting choices here. I’ve changed my methods since writing those posts and have turned to framing small pieces instead.
Feel free to leave a comment with any finishing advice you might have!